Recent Posts

Tuesday, December 06, 2016

DIY Wire Grid Memo Board (EASY)


I've been in the process of decorating and organizing my new filming and office space. I have a few DIY projects that I have in mind, and one of them is this Wire Memo Grid Board that I've seen floating around Pinterest. I've also seen Urban Outfitters sell this wire memo board for $59 (comes in three different colors)!!! Although it is cute and very tumblr looking, it's a little bit too pricey for my liking, so I took matters into my own hands and DIY'd it.

And what do you know... it's probably one of the easiest DIY I've ever made.

Share:

Wednesday, May 11, 2016

DIY Chloe "Hudson" Inspired Tassel Bag (& How I Styled It)


And I'm back at it again with another DIY video! I've been seeing the Chloe Hudson Tassel Bag making its rounds on Instagram and other fashion blogs which inspired me to spruce up my old, plain handbag with some colorful tassels. This DIY is a cute and easy way to add some fun and color to your spring and summer outfit. Also, it gives your old bag a chance to see the light of day again.

More after the jump...

Share:

Monday, May 09, 2016

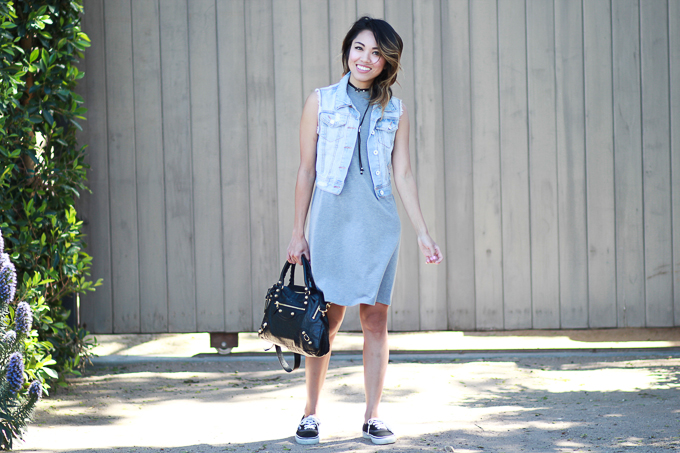
The Grey Dress

Funnel neck dress Topshop

When you're strapped for time or always on the go, you're glad to have those easy peasy, versatile pieces in your closet. Lately, my rule of thumb when I'm shopping for clothes is "will this get me out the door quickly?" That holds true for this dress (the dress I'm wearing is already sold-out, but here's a similar version with sleeves). Maybe I'm slowly transitioning to a more minimalistic style when it comes to getting dressed with the pattern I'm seeing lately with my recent clothing purchases. I've been looking for simple details that will be easy to mix-and-match with my current wardrobe.

High neck dress topshop


Since this dress is pretty minimal, it becomes a blank canvas for my accessories. While I can easily wear this alone, it wouldn't be a shabby idea to accessorize it with my latest DIY creations which allows me to wear this dress in more ways than one.


I've scoured the intenet for some other similar versions of this dress that will have you swinging this spring and summer:


Shop this Post

Share:

Monday, May 02, 2016

DIY Choker Wraps (3 Ways)

DIY choker wrap, DIY choker necklace, choker necklace DIY
It's been awhile since my last DIY project. Choker necklaces or choker wraps has been trending lately. These necklaces are the easiest accessories you can possibly make. You can also put your own spin to it depending on your style. They're also so easy to make that you and your friends can easily make multiples of this together to last you until Fall.

And if DIY is not for you, you can also shop some of my inspirations for this DIY:


Watch the Video and Picture-by-Picture instructions after the jump.

Share:

Tuesday, October 06, 2015

DIY Lace-Up Flats and Shirt

I usually get really inspired to film a DIY project when I try to clear things out of my closet. That's when my mind starts to roll with ideas on how I can transform something old to something "new". So sometimes I end up keeping things that I should really toss or give away, but I'm glad I kept some of the things in my closet today for this DIY.

Even though I'm going through my closet trying to figure out what I don't need, I also start to think about what I think I'm missing in my wardrobe. I've noticed that the laced-up style has become more popular lately. Lace-up skirt, shoes, shirts, and dresses... you name it. And because of this, my subconscience has been on a look-out for some laced-up flats. I have been perusing online (on Topshop and ASOS) for a cute pair.

Here are some options that I've also been eyeing lately. Click the left and right arrow to scroll.


And as I keep digging through my closet, I realized that I have a plethora of henley shirts from Abercrombie & Fitch and Hollister (henley shirts were part of my uniform back in the day when I used to work at both stores). Then I thought, this could be something I would wear again by adding a little something to it to make it a bit more updated.

Here are some inspirations for my DIY lace-up shirt.


So on to the DIY. This one is super easy to make and you could practically do it to any of your clothes that needs a little bit updating. But my favorite part of this DIY is that there is no sewing involved. At all.

Video and Picture-by-Picture instructions after the jump.
Share:

Friday, December 20, 2013

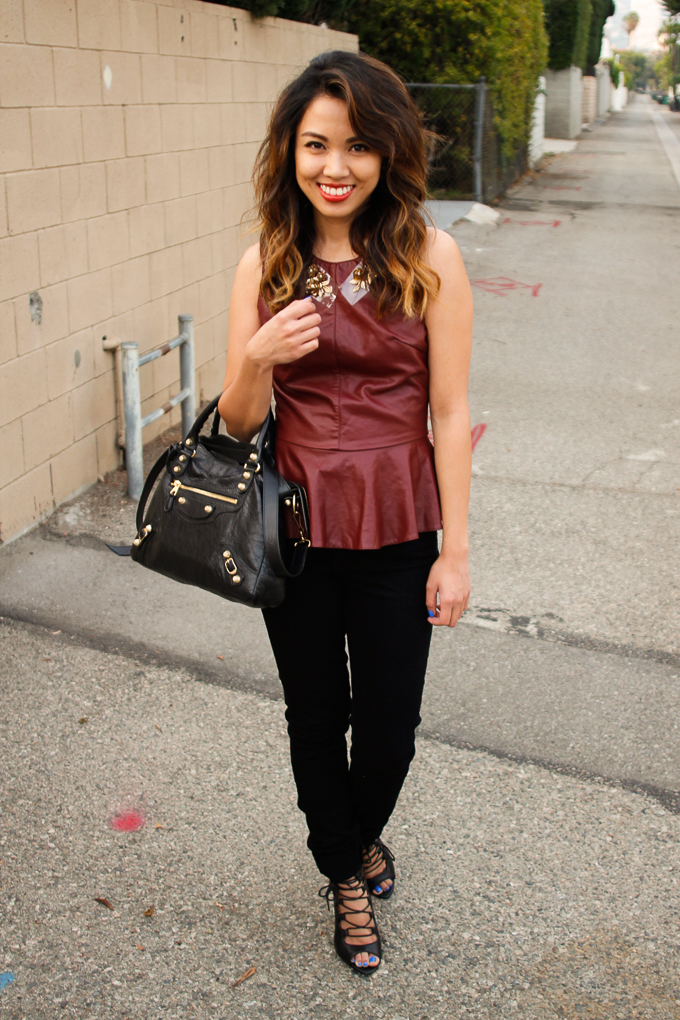
Oxblood

Lovers + Friends Oxblood Peplum Top, Rich and Skinny Jeans, beautybitten, outfit

And some more faux leather things. Toldya I was a teeny obsessed. I think I'm mildly going through a faux leather kick right now.

Share:

Wednesday, July 24, 2013

DIY Hanging Hat Organizer


I've struggled with organizing my growing hat collection ever since I started accumulating more. It became a full blown obsession early this year after buying my spike studded hat from Zara. I mean I've worn hats before, but for some reason that hat just ignited the fire even more.

So as my collection started getting bigger, I've been having a hard time storing them properly. At one point I was just throwing them inside my dresser, and I've lost a few hats by doing this since they've lost their shape.

Share:

Thursday, April 18, 2013

Friday, October 26, 2012

Halloween DIY: Selina Kyle/Catwoman Costume (The Dark Knight Rises) - Mask, Makeup, and Hair


Halloween is fast approaching! And since this year, it's in the middle of the week, you probably have a Halloween party to attend to this weekend. If you're still looking for a last minute Halloween costume, here's a possible idea for you just in case you don't want to spend a fortune on your costume.

Click after to jump to find out how I recreated Selina Kyle's alter ego, the Catwoman, from the movie The Dark Knight Rises. With a few items from your closet and art supplies, you'll have your costume this year in no time!

Share:

Monday, September 08, 2008

Pressing Pigments using Coastal Scents EZ Prez Pressing Medium (Tutorial)

I finally got around to pressing my mineral makeup. I finally used up all 15 pans in one palette and I'm pretty happy with the results!!! I pressed most of my TKB Trading pigments (Pop! Sampler and Julie's Garden) for this batch.

Oh, by the way, this post is picture heavy!

I know I said this will be a tutorial, but as Vanessa has mentioned, there are already way too many videos on YouTube how to do this. I specifically like EnKore's pigment pressing video (he has a few) and used that as my inspiration. And yes, it's possible not to make a whole mess out of this project!

Here are some tips and tricks that I learned along in the process of pressing pigments. It doesn't really have to be messy thing to do at all! Being an organized and clean freak I am, I manage to do the task with minimal pigment mess all over my workspace (ummm... the kitchen :]).


TIP #1: Sanitize all your utensils. Especially the quarter you're using. Although I still wrapped mine in a cling plastic wrap (for easy cleaning), I sanitized it anyway in a small container with alcohol (make sure you cover the top so the alcohol won't evaporate if you leave it overnight). This includes your mixing bowl, spatulas, and pans. Wipe them all with alcohol before starting.


TIP #2: Use a glass container when mixing your pigments. When I was doing my first batch of pigments I used whatever I could find in the kitchen: extra cough syrup cup, dipping sauce container (edit: accidentally) jacked from a restaurant xP, and the pigment sample jar. First of all, any clear plastic cup like the cough syrup will stain over time as you keep mixing your pigments. It's also hard to pick up your pigment because it clings to the sides. The dipping sauce was too wide and just has too much space. On the other half, the pigment sample jar is too small that there's really no room to mix your pigments which is the greatest mess-maker of all!!! So these items for me were just a no-go anymore.


I found this glass candle holder at Michael's which I thought was the perfect size and shape to mix my pigments. It was also only 99 cents, so it's not like you'd be breaking the bank getting one of these.

Why a glass candle holder???
1. The diameter of the holder is not too small or big (if it's too big, you're more likely to use more pigments, and you really don't need a lot).
2. The sides of the holder is straight making it easier to scoop every bit (or at least most of it) of pigments.
3. Since it's made out of glass, the container can hold it's ground while you're mixing because it has some weight (so it's not moving around too much).
4. It's transparent. You can see every pigment you have inside, making it easier to scoop the hell out of your mixture and cleaning it.
5. It's easier to clean. Wipe it with tissue with some alcohol in it after each use. No need for a sink to wash and clean your mixing bowl.


TIP #3: Use a skinny spatula with a long handle. I tried mixing my pigments with a tiny spatula (see image above). I mean all is great in the beginnning, but once you hit the third or fourth mixture, your hands will be cramping. It's just harder to hold a tiny spatula while you're trying to mix your pigments. The first spatula's head that I used was too fat which made it difficult for me to mix and transfer the pigment to the pan.
Again, same trip to Michael's, I found these spatulas in the painter's aisle for a whopping $2!!! And it has six spatula head sizes. They do sell the metal ones as well individually, but that's more dinero. This is the cheapest one I can find.

I used the spatula with a diamond head out of the six. It was the perfect one, I think, because the tip is skinny which makes mixing easier and picking up and transferring the pigment and the sides are slanted, perfect when you scrape for all the goods stuck on the side of the glass container.


TIP #4: Use little at a time. Use only what you think you need. You don't really need a teaspoonful of pigment in one pan. I would estimate 1/4 teaspoon is pretty good (or 2-3 scoops using my old spatula pictured way above). You can always add more later. You don't want to fill the pan to the brim because it will overflow and you will make a big mess once you press it down. Same thing with your pressing medium. You don't want your mixture to be too dry to wet. The mixture is good if it has a dough-like look too it (it's like making bread!!).


So like this! See how the mixture is not too wet? There's not much product wasted either and it makes the container easier to clean.


How it should look like after you transferred the pigment to the pan. See how there's not much goop in there??


TIP #5: Clean the container and the spatula after each use. Just wipe it using a tissue and alcohol and your good to go. Wipe your spatula first, then your container (only makes sense right??). The alcohol will pick up the rest of the pigment left in the container and sanitizes it as well. Use tissues instead of papertowels. It's just less of a waste.
TIP #6: Tap the the pan help settle the pigment. Just kind drop the pan on a flat surface until it settles (don't drop it too high!). This also lessens the mess before you press it. It gives you an even distribution of the pigment


TIP #7: After the pigment settles, press it with a papertowel using a quarter. It'll pick up the excess liquid in the mixture that helps cut drying time. It's also to compact the pigments together before creating those hatches.


Line them up! See even this step I try to keep it organized. Make sure after each use the colored part is facing up. Facing it down to the surface will kinda make the papertowel dirty for next use.


So that's all the tips I have to offer. If you can keep these in mind then pressing pigments won't be such a disaster.
Take your time. Do it on a day you don't have much to do. It is time consuming, but once you get things rolling, it gets easier and faster. Clean up after every mixing and keep things organize. Get all your materials in one place and cleaned up before you start. Find a work area where you have enough space for your stuff while you work.

So here's how my work area looked like after pressing ten pigments. Not bad eh??? It's just a bit cluttered with all the papertowel and tissue I used xP. I have more to go. But I'll save those for another day. I laid a papertowel where I'm mixing my pigments. Pre-cut the ribbon that you think you'll need to create the hatch. Spilled some pigment on your work area? All it takes is a tissue with alcohol and dab on it... don't try wiping it because it will smear. The alcohol will quickly pick up the pigment if you just dab on it.
SHAKE YOUR EZ PREZ PRESSING MEDIUM BEFORE DROPPING IT IN THE MIXTURE. I realized I forgot this important step after pressing nine pigments -___-*. We'll see how my eyeshadows will hold up later on. I was too caught up on things and was too eager in getting it done I guess?
Stay tuned for an upcoming post of transforming your Coastal Scents palette into something magnetic!!
**omgoodness... this is probably my longest post ever -____-*
Share:

Tuesday, August 19, 2008

DIY: Facial Scrubs

Here are some of my favorite homemade facial scrubs. Facial scrubs are probably the only skincare product that I've been refusing to buy even if they're drugstore brand. I just don't believe in buying scrubs for your face that contains ingredients in which half of them you can't pronounce, and that you can also easily make with ingredients found in your kitchen cupboard. With everything that's going on my face already, whether it be cleansers, moisturizers, or even makeup, I just want something more natural when I'm sloughing off dead skins. When you think about it, do you really need all the preservatives that goes into scrubs to rid of dead skin?

Here are a couple of suggestions for facial scrubs that I normally use. I'm sure none of this new to some of you since these scrubs have been around for a long period of time.

For the following concoctions, I basically use the same rations for each mixture: mix 1/2 part sugar and 2 parts honey and/ or extra virgin olive oil (EVOO) together (shoot, why not mix all three together as well). I usually just 'eyeball' the ingredients just to make sure I don't have too much sugar in the mix because doing so can make the scrub too rough on my face. I just make sure that there's enough sugar to scrub the dead skin cells off without butchering my face with it. Remember, be gentle with your skins!

Please, please, please, don't use the following ingredients if you're allergic to it. Although these products are natural and has its benefits, if you're just simply allergic to it, it really won't do you any good. So please before you put this on your face make sure you're not allergic to any of the ingredients.


Prior to using the scrubs, I clean my face and remove any traces of makeup first, and then apply the scrub on my clean and bare face.

SUGAR AND HONEY SCRUB

I love this scrub. Sometimes it doubles as a mask for me. After I apply the honey and sugar on my face, I just keep it on for a few minutes before completely washing it off. This scrub might get a bit sticky and hard to apply, to prevent tugging on your skin too hard, wet your fingers with water as you spread the mixture to your face evenly. This should help make the application process easier and a gentler especially when you're scrubbing. Make sure you get all the honey and sugar out of your face and hairline especially if you're doing this before bed. You don't want ants and roaches lingering in your room because of this.

SOME BENEFITS OF HONEY:

  • helps absorb and retain moisture
  • contains antioxidant and anti-microbial properties
  • absorbs impurities in the pores (helps with mild acne)

  • Source (1, 2, 3)


    EXTRA VIRGIN OLIVE OIL (EVOO) AND SUGAR


    For the EVOO scrub, the EVOO will be a bit slimy when you're putting it on and washing it off. So again just pointing out the obvious, make sure you completely wash off your face. What I like about this scrub, my skin just feel so smooth and moisturized after use. It's also not as sticky to apply compared to the honey scrub.


    **********

    I used to use St. Ives Apricot Scrub, but I found it a bit too rough on my skin. It was good in the beginning but later on down the line it made my face dry and I started breaking out from it.

    Ever since then, I used the natural approach with either using honey or EVOO and sugar. For people who have acne problems, I definitely suggest to try out the honey and sugar scrub. I only exfoliate my skin once a week at night since you really don't want to overdo this one and strip your skin with natural oils.
    Share:
    Blog Design Created by pipdig