Halloween is fast approaching! And since this year, it's in the middle of the week, you probably have a Halloween party to attend to this weekend. If you're still looking for a last minute Halloween costume, here's a possible idea for you just in case you don't want to spend a fortune on your costume.
Click after to jump to find out how I recreated Selina Kyle's alter ego, the Catwoman, from the movie The Dark Knight Rises. With a few items from your closet and art supplies, you'll have your costume this year in no time!
This past weekend, October 22 and 23, Beautylish hosted their first Beauty Social in Loews Hotel in Santa Monica. Another great event put together by the Beautylish team. I'm so glad to have been part of it.
I wanted to see what the buzz was about surrounding this palette. I've seen a couple of reviews prior to purchasing it on the day Urban Decay released it. Boasting fifteen new colors and a sick ass packaging, no time was wasted adding this in my cart.
Click the link below for my review and more pictures.
You know I had to do this makeup tutorial! I could totally relate to Kathy Beth Terry on the braces part. I wish this music video came out about three years ago when I still had my braces :).
Happy Friday y'all! I've kinda fallen off the wagon for a minute with all the hustle and bustle of life. But good thing I've drafted up some reviews in between, so I'll have some product reviews coming at'cha! I hope ya'll missed me :D.
So last Christmas, I received a super generous gift from a friend of mine. I guess I have been a really good friend since I received a few makeup items that had been on my wishlist. And one of them is the Urban Decay The Black Palette.
February 14 is coming up which means it's Valentine's Day (or Single Awareness Day). Yes, it's a Hallmark holiday and everyone should celebrate love everyday, but with all the cute and pink things on every shelf of every store, I can't help but love it even more and be just be festive.
I have a few more tutorials that I'm in the process of editing for this Valentine's day. Hopefully, it'll give all of you some ideas when you go out to dinner and such. If you've missed my post on my hair tutorial pictured below, you can read up on it here: Hair Tutorial: Easy Braided Low Bun Updo.
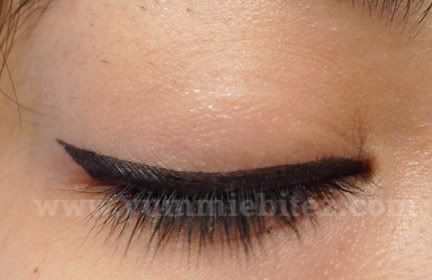
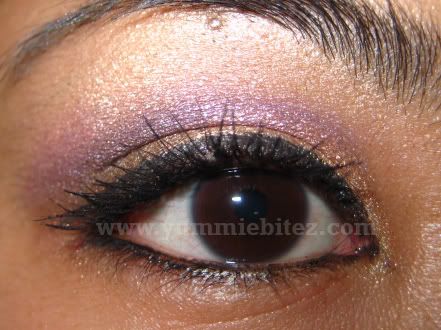
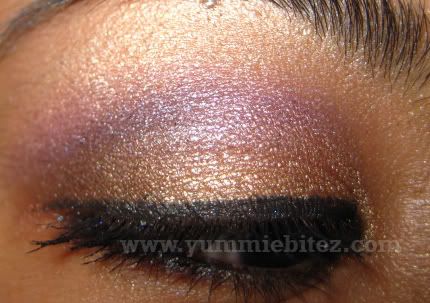
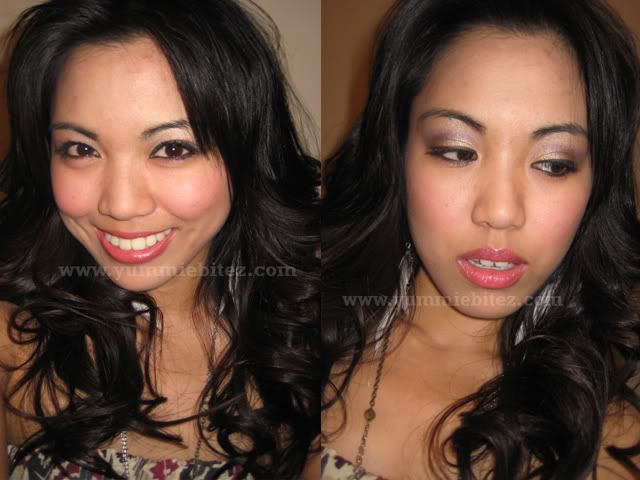
I almost didn't want to upload this tutorial because it took so many tries before I could finish editing the video since Windows Live Movie Maker refused to cooperate But now it's done, so here's my purple smokey eye look.
When I'm going to go out at night, my night look is either a smokey or a purple eye look. But this time, I just combined both. I love purple on my eyes just because it's so flattering. It's my second favorite color for that reason and because it matches with pink.
Watch the video:
For more images and detail on this finished look, click below.
Gel and cream liners will always have a soft spot for my heart. It was the one that helped me learn how to line my eyes with liquid liner.
My MAC fluidline in Blacktrack have dried out like a dessert. It had its good run and it has served me well, but I was open to try out other gel or cream liners. I love Urban Decay products and I love their 24/7 Glide-on eyeliners (review), but not as much as my MUFE Aqua Eyes eyeliners (review). Anyway, I decided to give their Ink for Eyes a whirl to see how they compare to their pencil counterparts.
Urban Decay Ink for Eyes Cream Liner in Zero
Product Blurb: It's everything you want in a cream eye liner: more precision than a pencil but more forgiving than a liquid. This ultra-creamy, paraben-free formula offers more control, play time, and buildable coverage. Create razor-sharp lines or smoky bedroom eyes with the double-ended angled liner brush and smudger. The secret ingredient? Nylon 12, a unique ingredient that decreases drag, creates a flawless application experience by eliminating skips or smears and also softening and absorbing excess oil. This creamy eye liner is available in a wide variety of sexy shades that stay put all day long. Decorated with a hand-illustrated peacock, the long, lean case (complete with mirror!) is ideal for applying color with the angled liner brush. (via Sephora.com)
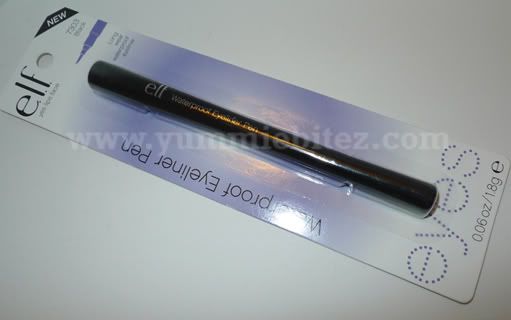
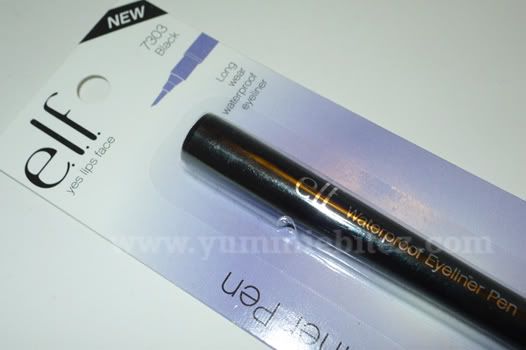
From the most recent event that I attended, hosted by Beautylish, they were handing out all sorts of makeup swag for us to try. One of them happens to be this e.l.f Waterproof eyeliner. I was actually interested in trying this out since I was on a hunt for a good inexpensive eyeliner. For a dollar, you can't get anymore inexpensive than that.
I haven't had the chance to try any e.l.f products up until now. I've always been a bit wary due to the negative feedback I've been reading or hearing about their brand. Regardless of what I knew or heard, I kept an open mind that maybe this one will work out for me.
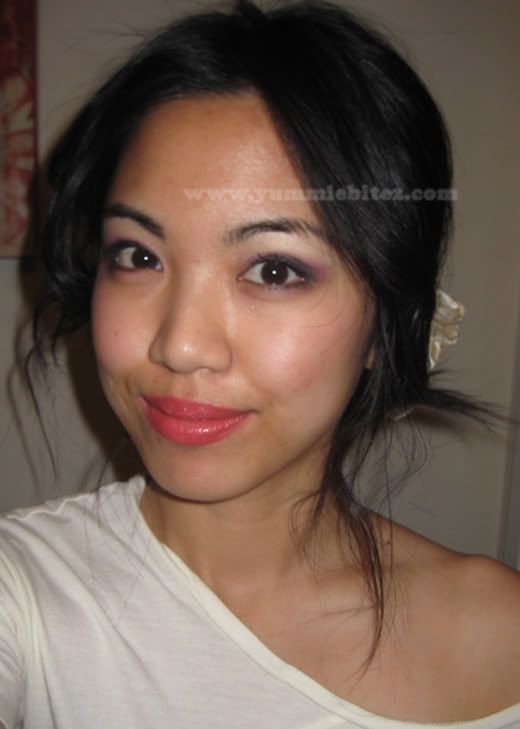
Day one of my trial run, the bf and I planned on a trip to a flea market in LA on a Sunday afternoon. It was a bit of a gloomy day, but the weather was pretty warm, around the mid-70s, and it was perfect. I didn't want to put too much effort in getting ready that day, so I just lined my eyes using e.l.f Waterproof eyeliner pen and put some mascara on.
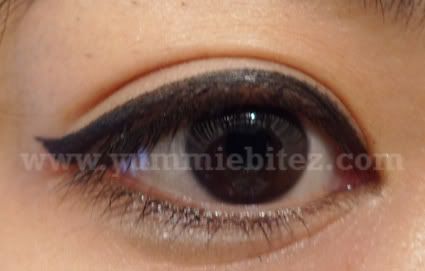
Because the eyeliner was in a pen form with a felt tip application, lining my lashes with liquid eyeliner was a cinch. I was pretty impressed on how precise the eyeliner pen lined my eyes. It was easy to control how thin or thick you want your line to be. I also didn't have to go back and draw the line again. I did it all in one swipe. I just achieved a cat-eye look in less than 2-minutes. Not bad.
I also swatched the eyeliner on the back of my hand. I tried rubbing it off, and it barely budged. At this point, I was pretty excited already. But little did I know at the time, its staying power would not be applicable on my lids.
After being out and about for maybe two hours, driving, looking for parking, and walking around perusing the local flea market, my bf taps my shoulder and says, "Umm... you might want to check your makeup." I look at him and thought he was crazy since I barely had anything on my face. I checked the mirror anyway. And to my horror, my eyeliner has crept up to my crease!! The line has faded and went north. It was a mess. I almost felt embarrassed since I've probably been walking around like that for awhile. Well, I guess the staying power of that was a fail. For the rest of the day, I found myself trying to clean off mess that my oily lids have created. Not to mention, my eyelids were getting a little itchy. It wasn't stinging, but it was itchy. It wasn't anything unbearable, but it was still itchy.
Day two of my trial run, this time I primed my eyelids with Urban Decay Primer Potion. The eyeliner still creased but it lasted a few more hours longer compared to sans primer. I still found myself checking the mirror and trying to clean up my eyeliner.
As far as removing the eyeliner, it really is waterproof. Although it created all sorts of mess on my eyelids, taking off the rest of the eyeliner will budge with water not unless you use a good makeup remover.
Overall: This eyeliner just didn't cut it for me on warmer days when my eyelids decided to secrete more oil than ever. I probably would only recommend this to people with non-oily lids (as the swatch on the back of my hand didn't really budge) who are looking for an inexpensive liquid eyeliner. This might also be a great practice tool if you want to transition into using liquid eyeliner. Although keep in mind, that it did make my eyelids itch a little. I'd probably only just use this again if ever I need black eyeliner to draw something on my face.
Watch the Video:
Rating: 2.5 out of 5
FTC: The product mentioned was a gift from a previous beauty event that I attended. I am not affiliated or sponsored by the brand company mentioned to write this review. These are my honest thoughts.
Yes, I'm back with a beauty related post. Here's a look that I've been meaning to edit since forever (previously recorded back in AUGUST)! I actually have another video pending to be edited so we'll see if I'll be able to get on that too. I actually had the chance today to edit my video only because I am sick and stuck at home. I swear I have an immune system of a 90 year old. I get so sick easily. Anyway, oddly enough editing videos are a bit therapeutic to me.
So here I am again today using the same palette. This is look number three using the Urban Decay Sustainable Shadow Box. I'm really trying to maximize the use of this palette as you can see (click here and here for the previous looks).
In case you might be wondering what my nail polish is on this post, it's O.P.I Indi-a Mood for Love (click here for previous post).
FTC: All products mentioned were purchased by me. I am not sponsored to write this post or to make this video tutorial. This post contains affiliate links.
So one day, I had my Trey Songz channel up on Pandora (by the way, Pandora is the shiiiit!) and Ciara's song Ride came up. Besides it being a catchy and bump and grinding song, I remembered really loving one of Ciara's look in the video. She just look extremely ferosh with her smokey brown eyes, not to mention her super sexy one-piece number with her fur coat (makes me want to strut my stuff in the club with that if I had the body). Oh, and if only I can move half as good as she can, my life might just improve 100 times better. I just wish I can say the same good things about her singing. But, her killer moves makes up for the lack of the latter I suppose. That's another story though.
You might have also seen me this look on my giveaway video.
Here is my interpretation of Ciara's glam look in the video. I've included step-by-step picture tutorial (doing it old school) after the jump and more pictures of the look.
For awhile now, I've been trying to figure out how I'm going to squeeze-in pursuing makeup freelancing on the side. After I got my degree, I thought I'd have all these time in the world to go after what I truly love to do. You know when you were in college, you think you'd have all these time in the world for hobbies and just to relax after you've graduated.
Well, not the case. Your priorities actually shift. You start to realize that you actually had more time when you were in school. You have to work full-time to support yourself. It's even more of a challenge when you move out from home. Yes, you do have independence and the freedom, but it comes with a price of having to do everything for yourself.
To save you guys the long, boring details, I won't be able to attend makeup school like I hoped for... at least not for awhile. Although I'm truly grateful for what I have, my dream after college was to be able to do what I truly love. So for now, I'm just going to teach myself and practice, just like everyone else, and resort to watching makeup tutorials on YouTube. And in the process, I'm going to try and document it by uploading my own videos more frequently. We all have to start somewhere.
Anyway, I was reading Stephie's blog and I've seen that she entered a contest in being hosted by Physicians Formula. It's a long shot, but I told myself I have to at least try doing contests once in awhile just because it'll be good practice for me.
Click on the banner if you want to vote for me! (end shameless plug lol)
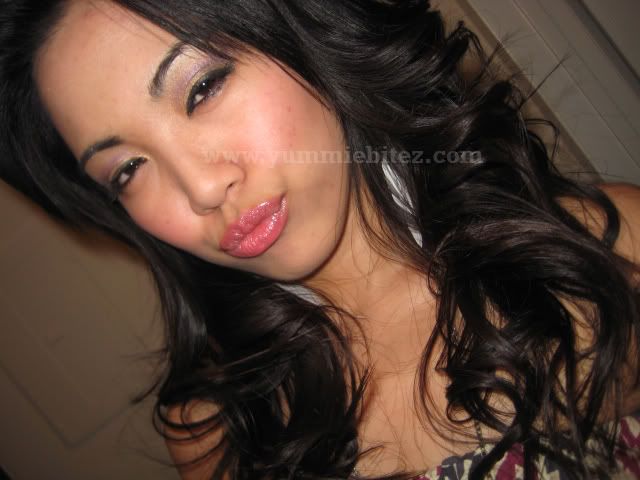
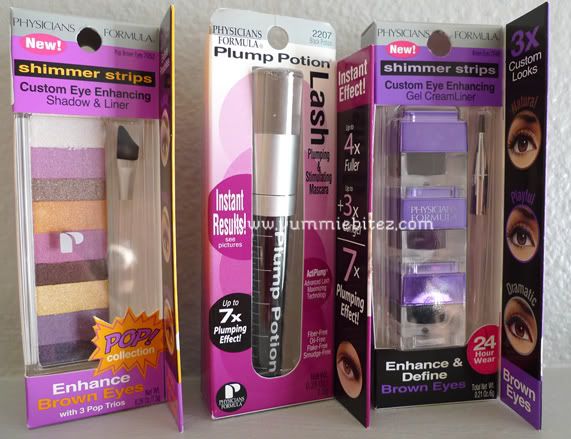
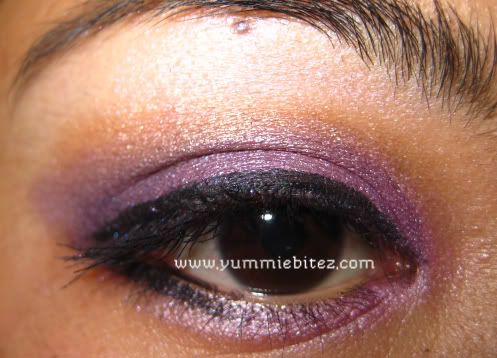
Here's a purple look that I did for the Physicians Formula contest. For my eyes, I only used Physicians Formula products (as pictured below).
**NOTE** The Physicians Formula website is taking awhile to process my video, so I'm not quite sure when it'll be up. However, I did edit a version for YouTube :).
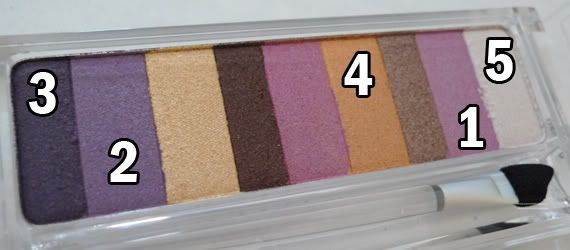
Since the palette didn't have names for the eyeshadows, I've labeled the color in the order that I used it for this video tutorial.
Face: MUFE Duo Mat Foundation in 203 using a synthetic face brush. For my cheeks, I used MAC True Romantic beauty powder blush.
Eyes: I applied the Urban Decay Primer Potion to prep my eyes and used Physicians Formula Gel Cream Liner in Purple as my base for my eyeshadow. I used the Physicians Formula Shimmer Strips Eye Palette for my eyeshadows. Using a shader brush, I applied PF [1] eyeshadow (lilac eyeshadow) on top of the base applying it all over my lids. Then, with a pencil brush, I took [2] eyeshadow (purple eyeshadow) on my outer V and bringing it up to my crease. To define my outer V area, I used [3] eyeshadow (indigo eyeshadow) with a pencil brush and then bringing up the color up to my crease. I blended the [4] eyeshadow (dark gold eyeshadow) just above my crease color to lightly blend the harsh lines. I highlighted my brow area with [5] eyeshadow (shimmery white eyeshadow) to brighten up my eye area. I lined my lash line and half of my lower lash line with Physicians Formula Gel Cream Liner in black. On the lower half of my lash line, I used PF [1] eyeshadow (lilac eyeshadow) with a shader brush. Curl lashes, and finish of your eye makeup with mascara. I used Physicians Formula Plump Potion.
Lips: Dior Cat Mauve lipstick.
For more photos of the finished look and the video tutorial, click after the jump!
I LOVE, LOVE, LOVE Lady Gaga. She's my favorite female artist of ALL-TIME! So I was just super excited to be able to snag tickets to her concert last Wednesday at the Staples Center six months before the actual concert (both LA shows sold out within minutes). If you are a true fan of her... you must see her live! It doesn't even matter where you sit really, it's about the experience of being there. I've been to a few concerts, and there's nothing quite like her show. It was the best one I've ever been to. Hands down. Besides her awesome, hair raising vocals, there's nothing is remotely close to how awesome her whole concert production was. Her costumes, props, and videos, nothing short from my expectations. In fact, it has blown me away. She really put on a show.
After leaving the concert, I was just still so amped from all the energy. She was also very, very inspiring which made me appreciate and love her as an artist even more. It was just a big party inside Staples Center. Lady Gaga knows how to get the crowd riled up!
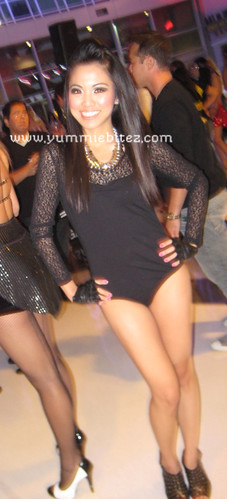
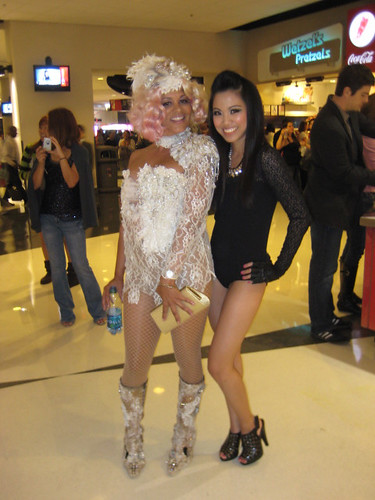
Here are some pictures from the concert. You know I had to dress up for it. Yes, I wore a leotard. But no, I was wearing shorts walking in Staples Center. I wasn't about to parade around the LA streets pant-less.
But the atmosphere inside Staples Center was just amazing. There were plenty of us who dressed up specifically for the concert. So many awesome costumes!
And this is my little number. Too bad, it looks something more like a "Single Ladies" video costume. I had to work with what I had already. Surprisingly, wearing a leotard was pretty liberating. I hope one day we'll all be free to wear pant-less outfits (ok just a little).
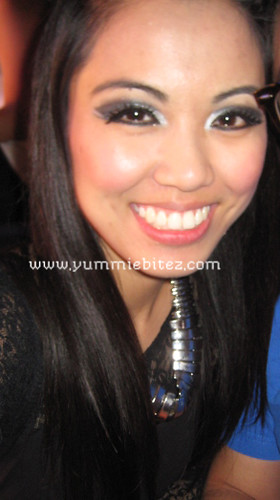
And can't leave without a makeup picture. I wish I took a proper one after I finished doing my makeup, but we were already running late for the concert and I had little time to get ready after work. When you think of Gaga, you just have to go bold and dark.
Lovessssss it. Dang these boys know how to rock them heels!
She nailed it!
Look at the sea of people behind me! It was crazy!
Plus 10 points for the Asian pose! Yes, Mr. J went to the concert with me. He was totally against going, but I managed to convince him to go with me :). BUT, he really liked and enjoyed the show after seeing it!
On my face:
Foundation: Makeup Forever Duo Mat in 203 Eyes: Prime with Urban Decay Primer Potion and MAC Soft Ochre paint pot. For a dark base, use MAC Blacktrack on your lash line and dragging it out to your outer crease and crease. Using a blending brush, use black eyeshadow (MAC Typographic e/s) to set the black base and to soften the edges. Blend, blend, blend the crease part for any harsh lines as you "cut the crease". Using a white cream base (NYX Jumbo Pencil in Cottage Cheese), apply the base color in your lid area. Set the base by patting it down your eyelids. Apply a silvery or white eyeshadow on top of the white base. Line your lashline with a gel liner. Apply mascara and use false lashes (Ms. Adoro i#15). Line your waterline with a black kohl liner (Makeup Forever Aqua Eyes in 0L). Cheeks: Use a shimmery pink blush on the apples of your cheeks (MAC True Romantic) Lips: Kiehl's Lip Balm for your natural lip color.
When Hautelook had their Urban Decay sale a few months ago, I just know I had to check out and see what goodies they had in store. And besides, Urban Decay is probably one of my favorite makeupline, not just because of their super cute packaging and witty product names, but because of the awesome quality that you're getting when you buy their products.
First item I saw was this baby right here, Urban Decay's Apocalyptic Kit that has seven different shades of nail lacquer goodness. Getting the kit was probably the best way try their nailpolishes without being stuck with a full bottle of what you hate, yet having the variety of colors to play with!
First of all, I'm glad to be back online! I'm finally hooked on the internet at home as my wireless modem came in today. I've been itching to blog for the past week since I have pictures galore and so many recent events happening lately. But with all the moving and stuff... I haven't really had the time or the internet to do much blog.
So on to business...
As majority of you already known, seen, and heard, three weekends ago was the International Makeup Artist Trade Show (IMATS) which was held in Pasadena. I'd like to thank Sara for inviting me to attend to the show and giving me the opportunity to cover the event. This year was actually my second time attending the IMATS, so I kinda sorta knew what to expect. But I think this year was definitely bigger than the previous one I have been to.
Last year, my main focus was pretty much doing as much "hauling" as I could, and meeting some of the beauty blogger babes as a meetup was setup prior to the event. This year, I tried to cover the event a little bit better and just become inspired back to makeup again after taking a long hiatus from it. I definitely saw awesome work from different talented artists during the show. It's so amazing how much an eyeshadow and lipstick can do, whether it be to transform someone or express your individuality and creativity.
Enough rambling, click on the jump for more pictures!
If these companies ever stop production on any of these items, I know all hell will break lose! Why would they discontinue such amazing product anyway? Here are my current top ten products that I'm just currently in love with (in alphabetical order).
1. Eyeko 3 in 1 Cream: The best highlighter in the world. I would choose this over NARS Coppacabana any time of the day for my highlighting needs. It's inexpensive. It's not insanely shimmery. And, most of all, it's easy to apply and blend on your cheeks. And it doesn't hurt that the packaging is so cute! It's definitely a face saver when you want to fake an awake look (Buy it here and Enter Code E122 for a free gift).
2. MAC Blacktrack Fluidline: My favorite eyeliner for my upper lashline whether it be a thin line or a cat eye. With or without a base underneath, fluidline doesn't crease on my oily eyelids like most eyeliners do. It's better than liquid eyeliner in my opinion.
3. MAC Rubenesque Paint Pot: The base of my choice. It keeps it from creasing and my eye makeup pretty. Nothing is worse than an eye makeup being salvaged by oily lids.
4. Mandom Cleansing Express Cleansing Lotion: Like I have mentioned before, I could've sworn these are unicorn tears in a bottle. This makeup remover will wipe your makeup clean off your face with two pumps. It's amazing what this product can do. I especially love this stuff on my "lazy" nights where just getting to the sink to was your face is an impossible mission. It will get you in bed as soon as possible (Buy it here).
5. NARS Lip Gloss, Rose Gitane: My favorite lipgloss shade! Can give you a that stain effect look, or just lick, lick juicy lips. It looks dark on the tube but it's perfect on my lips.
6. Queen Helene Mint Julep Masque: This literally saves my face from breakouts. Breakouts don't stand a chance with this mask. It's the cheapest yet most effective mask that I ever bought in my life. It really does what it promises to do, and this is one of the products that has definitely brought my face back to clearer state.
7. shu uemura Brightening Cleansing Oil 15.2 oz: Great cleanser for oily skin. Picks up any dirt or makeup debris and give you a clean and squeaky feeling without the tight and dry feeling.
8. shu uemura Eyelash Curler ($19): It's practically the holy grail eyelash curler of everyone in the beauty community. The only eyelas curler that didn't seem such a torture device. Self-explanatory why this made the list.
9. Urban Decay 24/7 Glide-On Eye Pencil, Zero: My kohl eyeliner of choice for my lower lashline or waterline. It doesn't smudge or budge. It stays put the whole day until you have to take it off. The pencil is super soft that it glides during application, and won't tug your eyes
10.Yu-Be Moisturizing Skin Cream 2.75 oz Jar ($24): Despite of the camphor smell (aka Vick's Vapor Rub smell), this works wonders on dry and chapped skin. It moisturizes your had without the greasy feeling, and only leaves it nice and smooth. It doubles as a lip balm as well and it really moisturizes your lips.